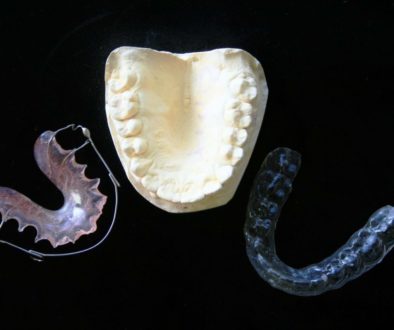
Dental Self Impression Guide and Tips
This is typically what the impression tray will look like. Try it in your mouth to make sure it fits around all your teeth before you take the impression.
Upper tray
Lower tray
Most self impression kits will come with two putties that you mix together to start them setting up.
Mix it really well. You don’t want it streaky like this.
When it’s mixed well, place a good amount in the tray. It should extend slightly above the edges in all areas. More is always better than less. Set a small ball of the material to the side so that you know when it is set up all the way.
Firmly place the tray down over your teeth with one steady motion. The handle of the tray should be centered. Once you have seated it down over the teeth, do not move the tray at all, especially not any side to side or front and back movements. This will cause the material to distort and you’ll get a bad looking impression. This is the single most important step of the whole process.
Apply gentle pressure to the tray. Don’t bite on it as this will tend to shift the tray. You only need enough pressure to make sure the tray doesn’t move.
Same thing for the top impression. Overfill the tray slightly.
Push it over the teeth and apply gentle pressure to keep it still and in place.
It usually takes about 4 minutes for the material to set up entirely. Test if it is set up with the small ball of material you set to the side. You should be able to push your fingernail into it without it leaving a mark. If the impression is removed before it is set, you’ll distort the material and your appliance won’t fit.
These are very good impressions (minus right around the back molars on the top one) and what yours should look like. The areas on the back molars would be fine for whitening trays, sports mouthguards, or grinding appliances. If it was for Smile Direct Club or a partial denture, I’d take it again and get a better impression.
This is basically what you want your impression to look like. Notice how there are no bubbles in the impression material. You can see around the individual teeth clearly. All the teeth, even the back ones are captured accurately. You can’t see the tray showing through either.
Here are some other tips to maximize your chance of taking a good self impression.
- Follow the directions given – I know this seems obvious but so many people don’t do it! Every type of impression material has slightly different directions and it pays to know exactly what they are before you get started.
- Follow the times given – You absolutely must let the material set up all the way before taking it out of your mouth. If you take it out too early, you’ll distort the impression material without even knowing it and this will cause your appliance to fit poorly or not at all.
- Dry your teeth before molding the putty to your teeth. Water is the enemy of dental impressions. Too much water on your teeth can lead to bubbles and voids in the material, making for a bad impression.
- If you take a bad impression, spend the couple of extra dollars for more impression material rather than sending in your bad impression.
And about gagging…
- The impression putty is usually easier to tolerate than the kind of stuff that is used at your dentist’s office which is more runny. The putty is very thick and tends to stay right around your teeth.
- Self impressions are usually better for gagging than if someone else does it
- Gagging is mostly a mental thing and you can get better with it (I know because I used to be the worst gagger ever and managed to get over it).
- Try to relax and breath through your nose.
- Leaning forward is often helpful.


